
Invoice List View
When you launch Reconciliation for the first time, you’ll land on the Invoice List View. From there, everything you need is available through a clean and intuitive layout. Let’s walk through each part of the screen from top to bottom.
Top Navigation

Hamburger Menu (top-left): lets you switch between Payroll and Enrollment reconciliation views.
Reconciliation Period Selector: just below the menu, you’ll find the month selector. Click on it to pick the reconciliation period. Tabulera supports one month at a time, keeping things focused.
Statistical Panel
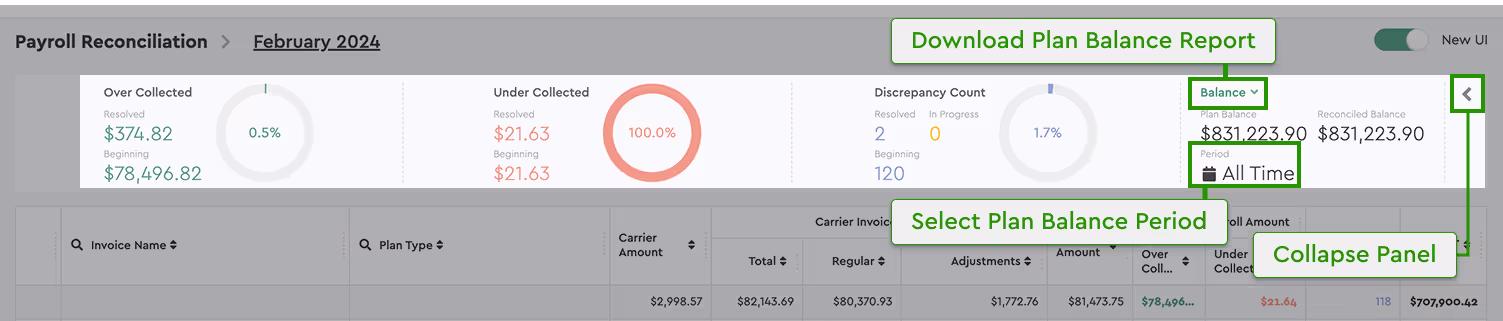
This panel gives you a quick summary of your current reconciliation progress. It shows:
Invoice List
Here you’ll see all the uploaded invoices for the selected month, along with key statistics.
Employee List View
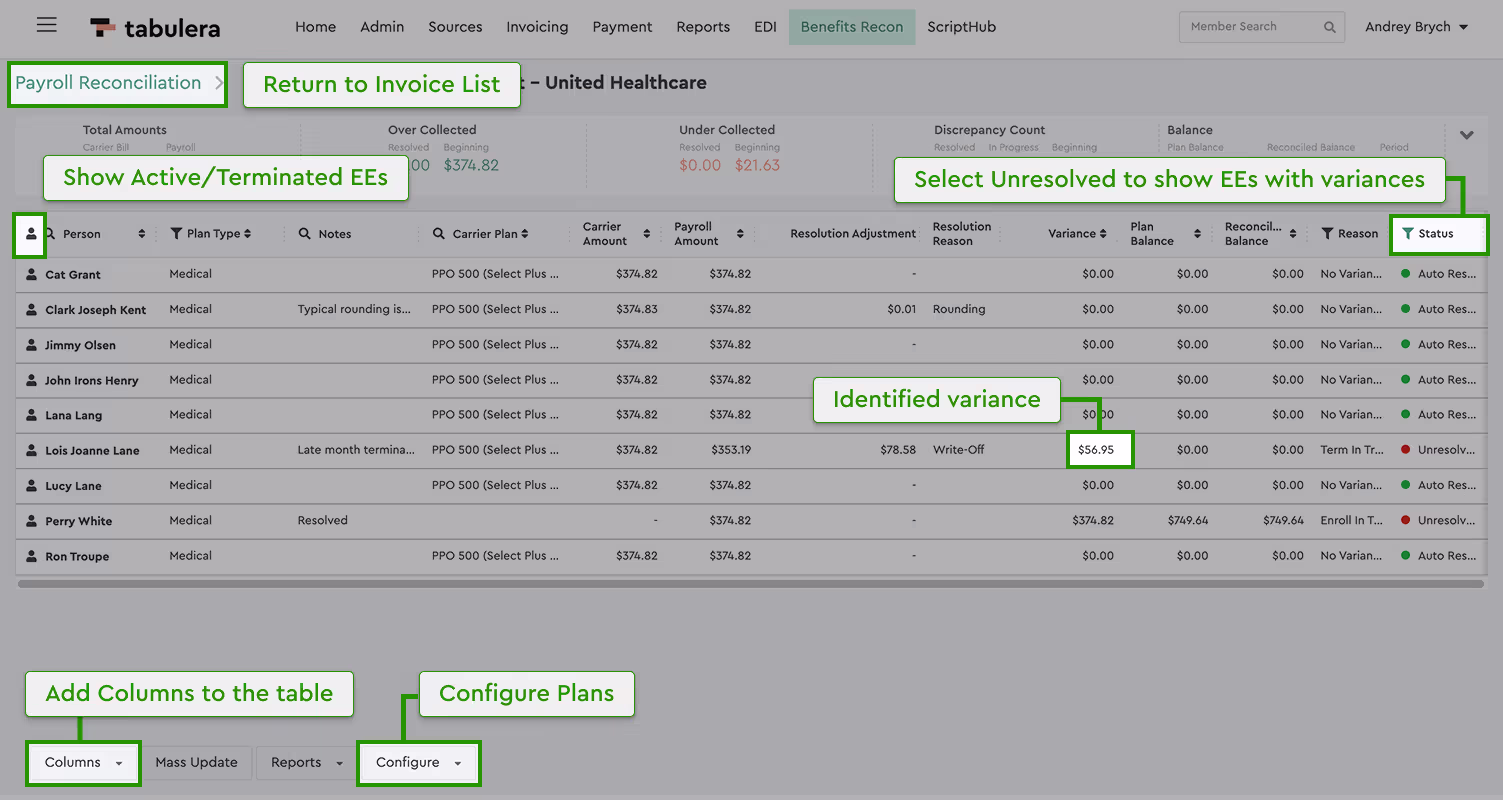
Click on any invoice to open the Employee List View. The layout is similar to what you’ve already seen, so it should feel familiar.
Statistical Panel
The panel at the top of this view changes depending on the reconciliation type you’re working with.
Payroll Reconciliation
It’s almost the same as in the Invoice List View, but with one extra tile:
Enrollment Reconciliation
Switching to Enrollment Reconciliation updates the panel:
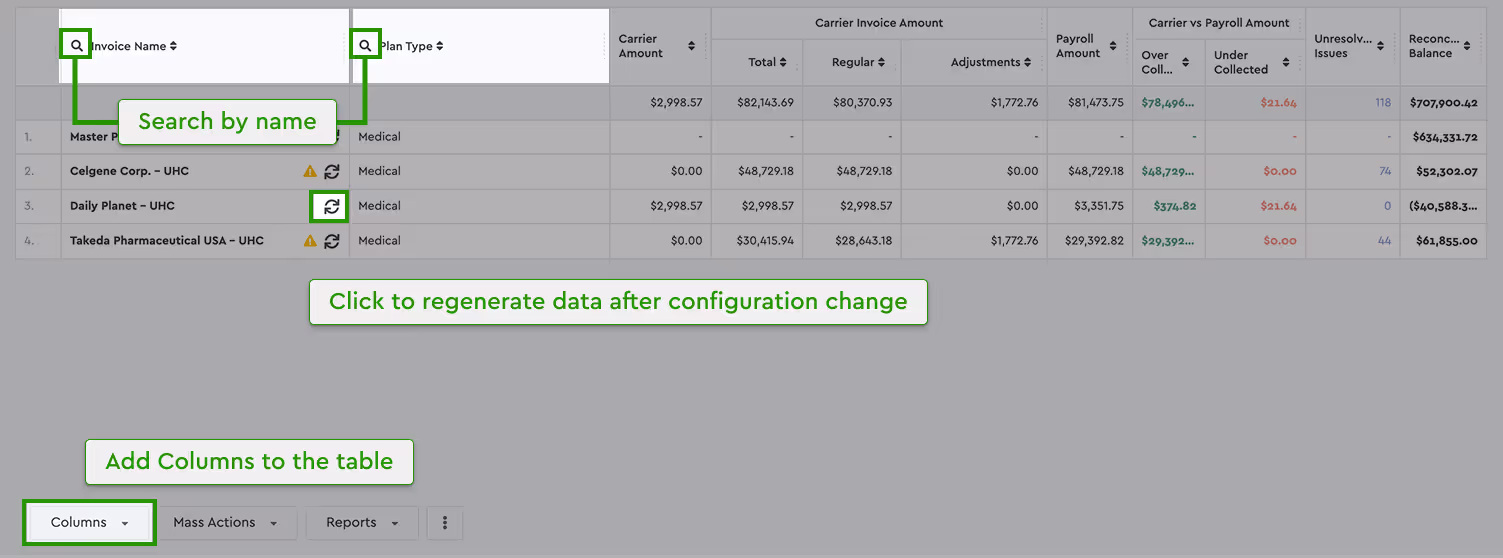
Employee Table
This table shows all employees listed on the invoice.
Available Columns:
Utility Panel
The bottom panel contains tools designed to speed up your work.
Employee Detail View
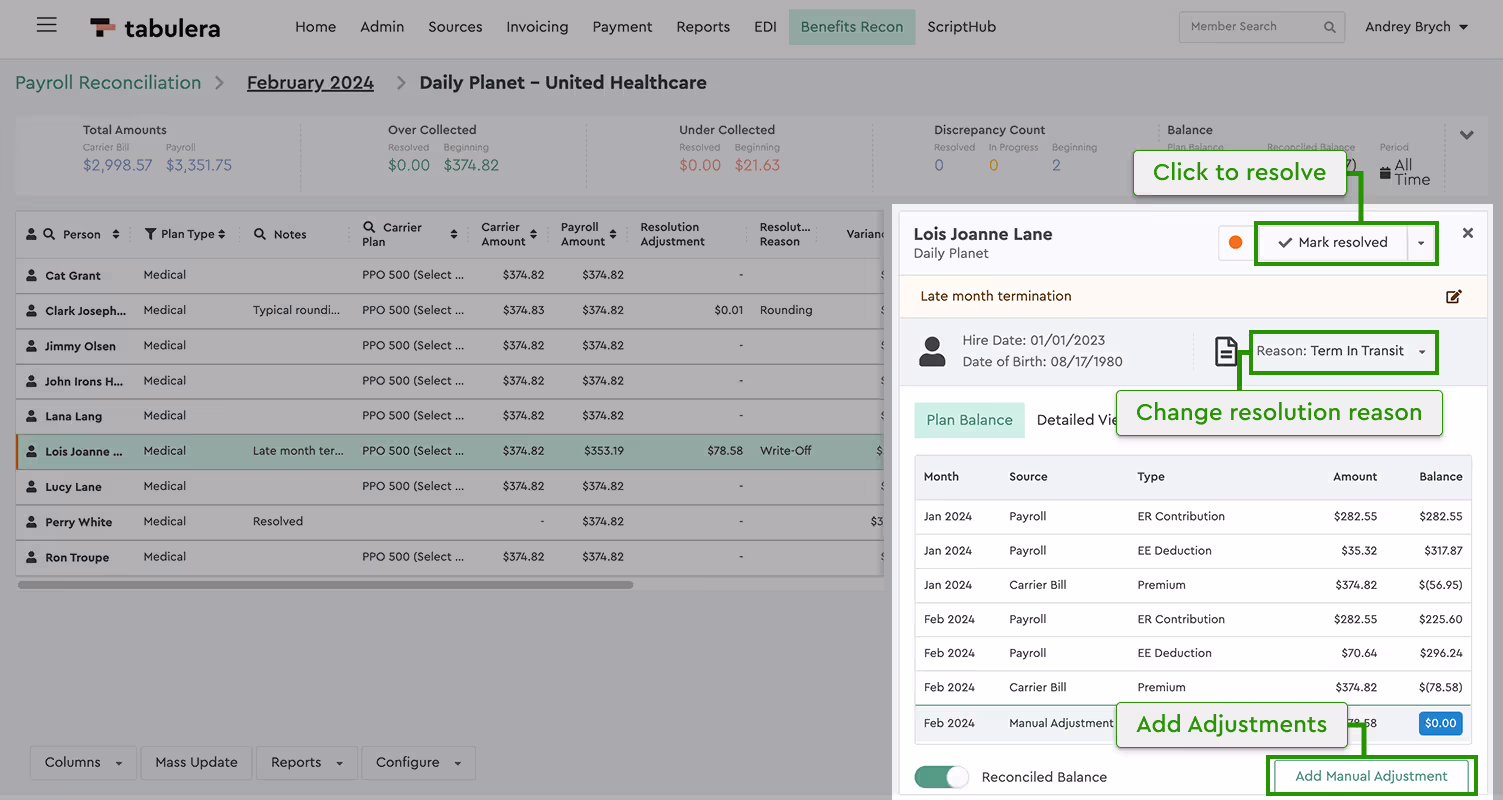
When you select any employee in the Employee List View, the Employee Detail View panel slides in from the right.
Top Section
Notes Section
Add internal notes related to this employee. Use Mass Update in the Utility Panel to apply notes to multiple employees.
Middle Section
Bottom Section
Five tabs give you deeper visibility:
The Plan Balance tab acts as a running ledger of all financial transactions tied to the employee’s benefit plans. It gives you a detailed view of how premiums have been collected, adjusted, or written off over time. Two key tools in this view help you maintain accuracy: the Manual Adjustments button allows you to post Beginning Balances or apply Write-offs when needed. The Reconciled Balance toggle lets you switch between the actual balance and an adjusted view that accounts for payroll frequency differences, helping you align more accurately with carrier billing cycles.